Fall Update

OK so fall was 4 months ago and it’s almost spring.  We actually did a ton of work on the garden this past year, but being the lazy guy that I am the blog didn’t get updated.  So here’s a quick summary of what happened since May 2014, and I’ll be elaborating on what worked and what didn’t:

Converted some sprinkler zones to a drip system

Made a road trip to Womack’s Nursery in DeLeon, Texas to pick up some fruit trees which were planted along the fence
Tried my hand at brewing soil…a.k.a. COMPOSTING!

Chopped down a couple more trees and some bushes to make room for the expanding garden

Got a dump truck full of chipped wood to cover the garden areas (had to move the pile with a rented Bobcat skid steer – FUN)

Built a chicken coop

Planted corn, beans, and squash only to have the squirrels eat them ALL

Got bees!

Stay tuned for more updates!!

Step 2: Prepare the Soil

After analyzing the soil in our backyard, the next step is to design the garden. I wanted a simple productive garden, and my wife wanted a garden worthy of Pintrest.com. For those of you unfamiliar with Pintrest, it is a website that makes all of my projects look inferior. So like many things in marriage we compromised: we used the cloud based software from www.growveg.com to design the garden area. The garden will be epically beautiful like Versailles, and I can harvest a ton of veggies. I will make a separate post about the software.  This picture shows the raised bed layout in the northwest corner of our yard where we cut down the tree:

Flash

After laying out the basic garden area, we had to figure out how to add amendments to the soil. Since the the first four to six inches of soil contain most of the nutrients and soil life, it is best not to disturb this layer and instead to add organic matter on top. However this is also the slowest way to condition the soil…and we want to grow crops NOW!  The next best thing is to till the amendments into the soil then inoculate with microorganisms to jump start the soil ecosystem again.  Here’s the process:

1) add the correct amount of organic fertilizer and soil amendments (see previous post Step 1: Soil Analysis)

2) add some compost

3) inoculate the soil with microorganisms and root fungi

4) till all this into the ground with this tiller

5) cover with newspaper to smother the grass and weeds (don’t use the glossy pages)

6) drop on a raised bed and fill it with half decomposed wood chips

Once I calculated the right amount of organic fertilizer (based on the analysis and recommendations from Texas A&M soil lab), I simply made a big bucket full and used 1.8 lbs per 4′ x 6′ plot.

Next I spread half a bag of cotton burr compost over each plot to get some organic matter into the soil.  I bought the compost from the local gardening store Marshall Grain.  You can use any organic compost, but cotton burr is a good bang for the buck at $9 for a big 3 cu ft bag.

Then I added a cap-full of microorganisms and root fungi to a watering can and spread it on the area.  The microorganisms will get the soil healthy again and break down organic matter.

Finally I used my new electric tiller to chop up the top few inches of soil.  There were so many small roots from grasses, bushes, and crepe myrtle trees that I would till for about 30 seconds then spend the next 5 minutes removing tangled roots from the blades.  I probably could have rented a heavy duty gas tiller…but for a little more money I now own one.

After adding amendments, compost, bio-inoculants and tilling them into the soil, I watered the area (using filtered chlorine-free water) and covered it with newspaper.  Newspaper will smother any grasses or weeds that try to grow in this newly awesome soil.  Wal-Mart actually had stacks of free newspapers that I graciously accepted…I even left a few for the folks who actually read them.  I only used the paper printed with soy inks because they will decompose (not the shiny papers for advertisements).  Once the newspaper was laid out about 5-8 sheets thick over the entire plot area, I dumped on some half decomposed wood chips.  This newspaper/wood chip technique works very well and you can learn all about it at the Back to Eden website.  Basically the wood chips break down over a few years time and create excellent soil.

Then I dropped on a 4′ x 6′ raised bed that I made out of cedar fence board planks and spread out the wood chips evenly to several inches depth.  The deeper the better, up to a foot deep is still OK, but I didn’t have that much wood chips.  I used cedar fence boards for the raised beds because it is naturally bug resistant and doesn’t have any formaldehyde or preservatives that leach into the soil.

Whew!  Even I was sweating writing this post.  It actually took several weekends to get all this stuff done.  But now we can plant seeds!  Stay tuned…

Step 1: Soil Analysis

Container gardening with bagged soil is much easier than growing in Texas gumbo, but for the size of our garden importing soil is too expensive. So we did the next best thing: we got our soil analyzed to see what we need to add.  (Note for lazy people: skip to the end for the cliff notes version of this post)

Remember the analogy “if you give a man a fish he will eat for a day; if you teach a man to fish he will eat for the rest of his life”? When you fertilize the soil, you are just feeding the plants.  If you add the right concoction of organic materials, compost, and microorganisms, it builds up the soil ecosystem and then the soil takes care of itself.  So before we plant crops, we actually need to “brew” the soil so it will continue making nutrients for the plants.  Having the soil work for me will allow me to be lazy later 🙂

There are two places in Texas that will analyze soil:

Texas Soil Lab

And Texas A&M

I went with the Aggies since the tests were a little cheaper and more comprehensive for the price.  All I had to do was dig a hole about 6″ deep and take soil samples from 6 to 8 spots in the backyard.

We did the Routine + Micro + Boron + Organic matter test for $44.00 because we’re growing fruit trees so we wanted to get the amount of boron analyzed.  I also asked them to recommend fertilizer amounts for both the fruit trees and vegetable garden.

I visually inspected the soil and discovered we totally lucked out…it’s not the Texas Gumbo soil that most folks in North Texas are cursed with. We have more of a reddish sandy loam, at least for the first 12″ and then it turns into red clay. I’m not sure if the builder imported dirt and sand to level the property or if it’s naturally occurring, but hey I’m not complaining.

We got the results back via snail mail in about two weeks.

soil analysis gardensoil analysis fruit trees

The soil is slightly acidic at a pH of 6.4. Remember your Chemistry? The lower the pH means more acidic, the higher the pH is more basic (also called alkaline) with pH of 7 being neutral. So pH 6.4 is good; lots of edible plants won’t grow in alkaline soil.  Most soil around Dallas is alkaline.

In addition to analysis, they tell you what you need to add to your soil to bring it up to the “critical level” of nutrients. Since we’re not adding any synthetic fertilizers, I had to calculate how much of the organic amendments to add…which gave me more flashbacks to Jr. High School math class.

OK students, let’s calculate the amount of Nitrogen, Phosphorous, and Potassium to add to the soil for the vegetable garden.  On any bag of fertilizer, organic or synthetic, you will see three numbers. These correspond to the percent of N, P, and K in the fertilizer.  So for a bag of fertilizer that says 5-8-4 you would have 5% N, 8% P, and 4% K per weight.

For those of you who love math, here’s the equation: A&M recommends 1.2 lbs Nitrogen, 3.3 lbs Phosphorous, and 1.0 lbs Potassium per 1000 sq ft. The best organic fertilizers are Blood meal for Nitrogen, Bone meal for Phospohrous, and Green Sand for Potassium.  Apparently dogs and other animals will dig up the blood/bone meal so if you have canines or raccoons you will have to till it in the soil really well, or mix it in with some manure and put some rocks around it to discourage digging.  The closest gardening store, Marshall Grain Co., sells these organic fertilizers:

Blood Meal 12-0-0               2.7 lbs for $8.99

Bone meal 0-10-0                4 lbs for $5.99

Green Sand 0-0-3                6 lbs for $5.99

How much of each would you need to mix to cover a garden plot of 1000 sq ft, and how much would it cost?

Luckily this isn’t 7th grade math class…in the real world you can google anything and A&M just happens to have an online calculator that does all this for you [insert evil laugh]:

http://soiltesting.tamu.edu/webpages/calculator.html

The online number crunching revealed that we need the following mix for 1000 sq ft:

10 lbs of 12-0-0 blood meal

33 lbs of 0-10-0 bone meal

33 lbs of 0-0-3 green sand

For a 4′ x 20′ plot we would need 0.8 lbs blood, 2.6 lbs bone, and 2.6 lbs green sand.  DONE!   A+

The soil analysis also showed our soil is low in Boron but it didn’t give an amendment recommendation. Boron is required for good fruit tree development and I even paid extra for the analysis. So I called the soil lab and asked what’s up. Boron is a trace mineral so to bring our soil up to snuff it would barely take 0.02 lbs / 1000 sq ft. So the best way to add Boron it is simply to mix in compost. So save your money folks and don’t get the Boron analysis, they will just tell you to add compost.  Same with the sulfur…our soil is already acidic and sulfur will make the soil more acidic which we don’t want.  So there’s no point in adding these separately to the soil amendments since compost will already have these trace minerals.  The limestone recommendation is just to make the soil more alkaline for the fruit trees.

We have 1.97% organic matter in our soil…whoop dee doo.  This number doesn’t really give any useful information and I’ll be adding some compost anyways.  I should have just got the routine + micro analysis for the soil for $17.


So here’s the Cliff Notes version of this post:

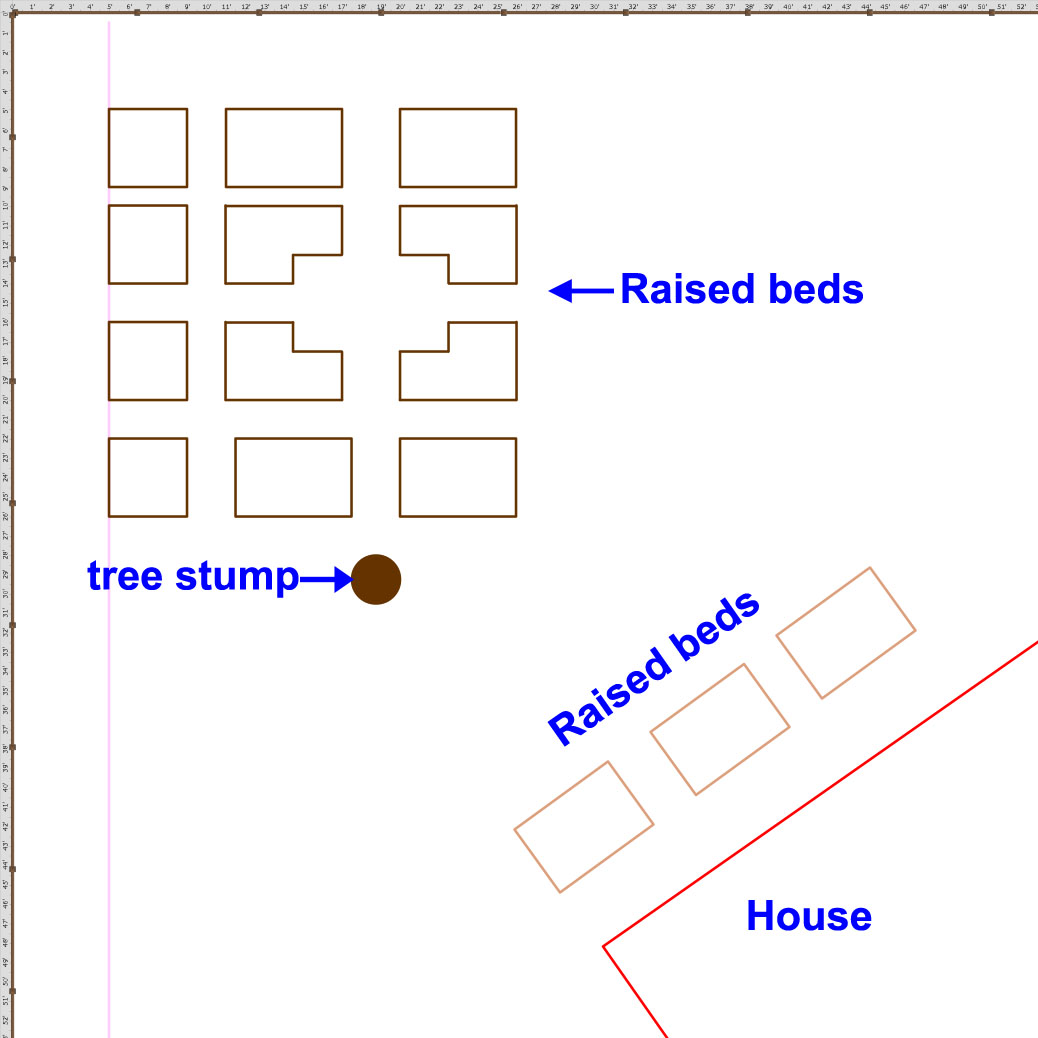
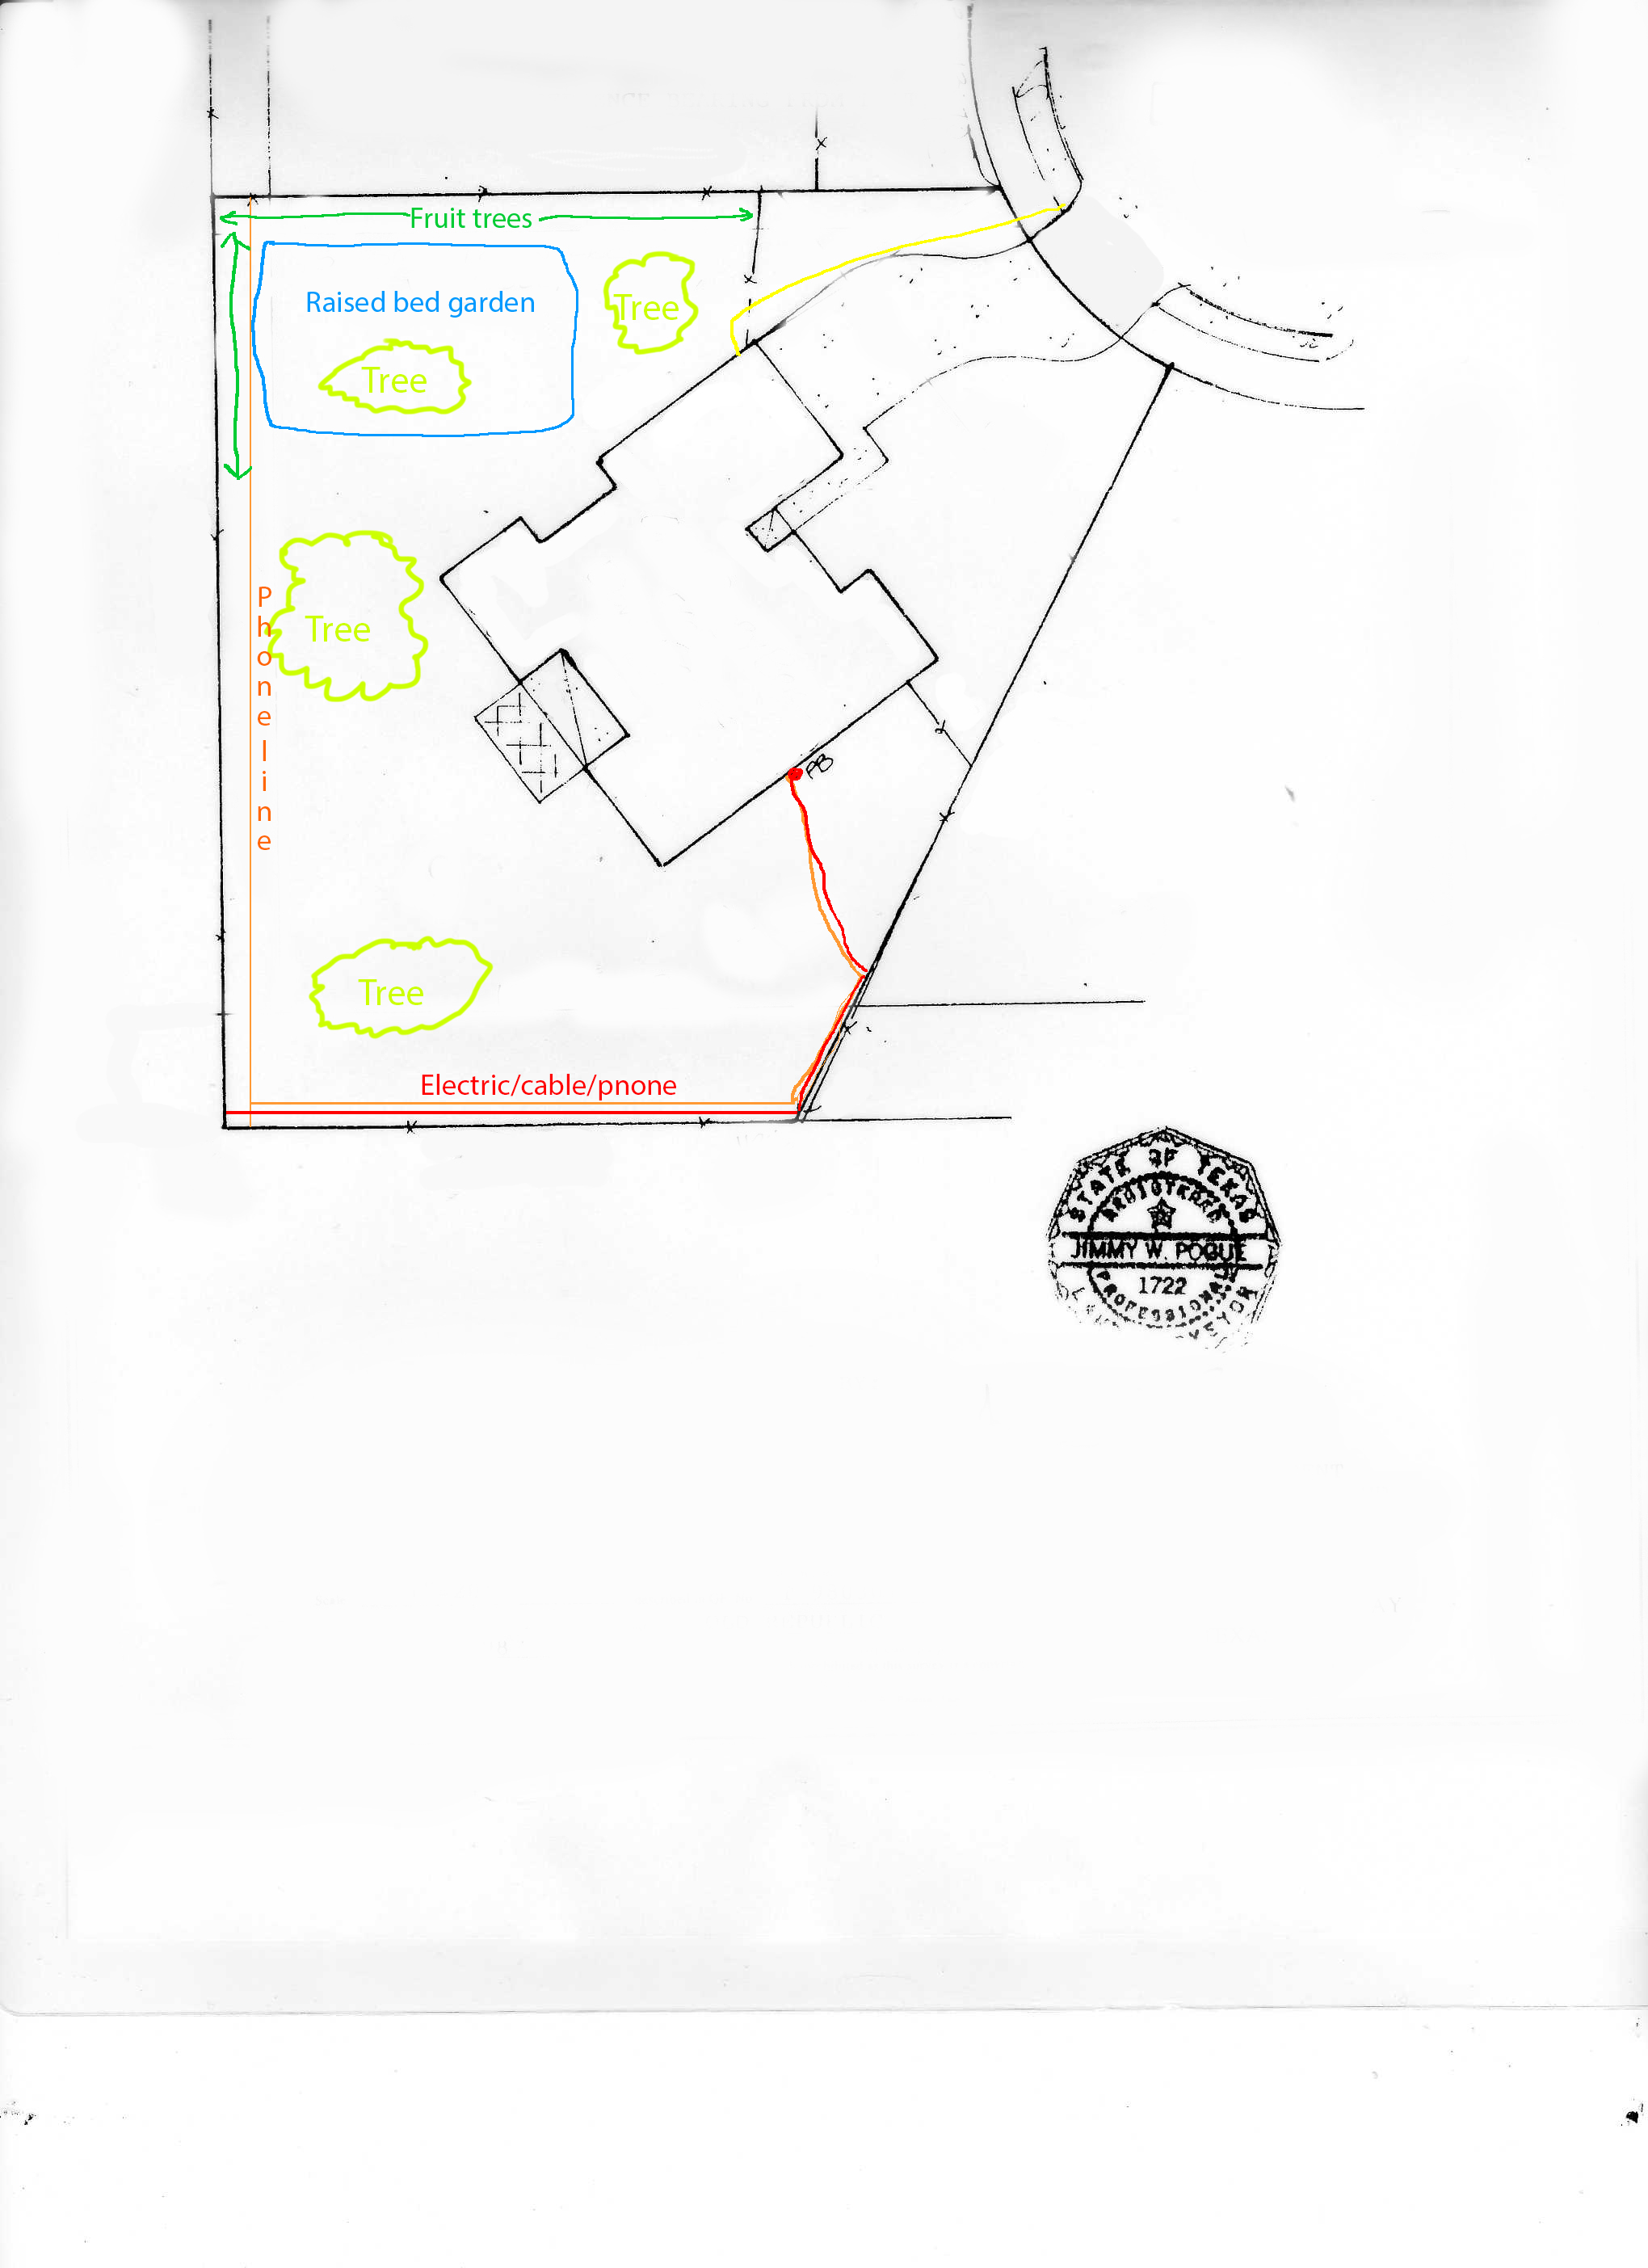
1) Measure the size of your garden and calculate the area
2) Get your soil analyzed HERE or HERE
3) Call your flavorite gardening store to find out how much N P and K are in their blood meal, bone meal, and green sand
4) Use THIS LINK to calculate the amount of organic fertilizer you need to add to your soil.

Stay tuned for the next post where I will show you how I mixed in the organic fertilizer, compost, and microorganisms to the soil and prepared the lawn for transformation!

Challenges of growing crops in North Texas

North Texas is a very difficult place to grow edible crops.

“You mean I can’t just plant something in the ground and walk away?”

No, this isn’t Costa Rica.  The following items are, in no particular order, the problems that we face:


Soil.

We have this thick clay soil nicknamed “black gumbo”.  If you own a home in the Dallas/Fort Worth metroplex chances are your property is nothing but this stuff.  It expands with water and shrinks when it’s dry causing all sorts of foundation issues.  Homes creak and pop all night long, new cracks randomly appear along door frames and ceilings.  If you try and shovel your back yard it is like digging through silly putty studded with rocks.  To make matters worse black gumbo is alkaline so few crops will grow.


Weather.

North Texas has a fairly harsh climate.  We have two seasons: Summer and Not Summer.  Not Summer lasts from November to February, is fairly mild, but we do get below freezing quite often and the occasional snow/sleet storm.  Just enough to prevent growing tropical plants outside.  March through May is in between Not Summer and Summer.  It is a nebulous time of year that is an excellent growing season very similar to the Mediterranean except we receive crazy downpours and crop demolishing hail storms.  Then summer comes along around mid-May, temperatures soar into the triple digits, and for a few months we wonder what rain looks like.  Then October rolls in a we get a few more weeks of Not Summer sprinkled with more hail storms and tornadoes.


Water.

North Texas usually receives deluges in March and April and then it is dry for several months during Summer.  It’s a feast or famine climate.  Because of this water restrictions are usually put into effect.  In 2013 and 2014 in particular all the lake levels (actually reservoirs) around DFW are really low.  Chances are you won’t be able to use that nice built in sprinkler system to water your thirsty lawn enough in August…so the lawn just dies.  Fortunately we’re turning our lawn into an edible garden and there’s a few tricks we can use to conserve water…


Bugs and plant diseases.

There’s a ton of bugs in North Texas, and most of them (or so it seems) are specifically designed to eat your plants.  Therefore a lot of people turn to chemical pesticides to kill the grub worms, grasshoppers, pill bugs, etc.  Plant diseases are also problematic.  This is usually an on going battle and the solution to keep plants healthy lies with organic fertilizers and pest control.


It’s just plain hot and your favorite plants won’t grow.

No you’re not going to get raspberries to grow and produce big juicy red berries.  Instead plant Texas hardy blackberries!  This is the general strategy for all crops in North Texas.  Get the proper root stock and pick varieties that require little water and are heat tolerant.


Squirrels, birds, and raccoons.

If you figure something out let us know…unless your name is Wile E. Coyote.


In the following weeks I will be addressing each of these issues in a separate blog post and how they can be solved with a little planning.  So stay tuned!

-K

Timber!

To open up our backyard gardening area, we had to fell a medium size pecan tree.  So here is a video of us cutting down the pecan tree.  Fortunately I’ve got some great friends who will work for beer and BBQ ribs.  Unfortunately Beavis just happened to be singing along to Pitbull’s song Timber at the same time.

Now I’ve got many years worth of pecan wood for my smoker.  And of course we brewed some beer too.


The beginning…

First thing before planning the garden I called 811 and had the utility companies come out and mark all the gas, water, electric, phone, and cable lines.  It’s a free service and they just come out with a giant metal detector looking thing and a can of spray paint.  Since we’re planting fruiting trees I didn’t want to put them over any utility line.  Here’s the layout of our property with the utility lines marked.  The orange is phone, red is electric and yellow is the gas line.

yard without measurements


Since the buried electric lines run on the south border of the property, we’re not going to plant anything there yet.  The biggest consideration for planting the garden is where the sun hits the yard since we want full sun for most of our crops.  The north 1/3 of our yard gets the most sun so that’s where we’ll plant all of our stuff this year.  We’ll put the fruiting trees along the north fence and the raised beds in the northwest corner.  We’ll also put some fruiting trees along the west side fence since we don’t have a land line (who uses their telephone lines nowadays anyways?)

The only problem is a pecan tree shading that area of the yard.  Time to break out the chainsaw…


Why?

Why do we want to spend our precious time turning our backyard into an mini farm?  The simple answer is this: we don’t want to buy fruit that was picked 3 weeks ago in a country thousands of miles away.  Merging the food chain and the supply chain is great for the global economy and makes sense for processed or frozen foods with a long shelf life…however everyone knows that with fruits and veggies fresh is best.  

We want to eat seasonally: peaches off the tree in June, pears in August, apples in September, and persimmons in November.  We want fresh non-GMO sweet corn.  We don’t want to pay $2 for a small bunch of organic cilantro.  We don’t want tomatoes that taste like chalk and were ripened with ethylene gas.  And most of all, we want to figure out how to grow all this in a suburban North Texas backyard when everyone else has a boring lawn.